Friday, April 10, 2015

Freestyle Florals

FreestyleFlorals_Pair

These beauties were inspired by Laura Bassen's creation for the Mama Elephant release of Freestyle Florals.
I simply stamped an A4 sheet full of all the different images (flowers and leaves), coloured them very loosely with the Kuretake Gansai watercolours and then sat down in front of Comic Relief does Bake Off and cut them all out. Yes, by hand! With a pair of scissors! I’m slipping…
FreestyleFlorals_Birthday
The birthday sentiment is from the Winnie & Walter set  - again hand cut! – and selectively glued to make it stand out.
FreestyleFlorals_Mothers
The “mother’s” was designed on and cut out by the Cricut (I say designed, it looks like Lucida Handwriting from here!) and I think the other words are from the Big & Bold set too.
Pretty huh? And even I can’t kill these kind of flowers!

Wednesday, April 08, 2015

Long Landscapes

I might upset some people here but I am not really a fan of Tim Holtz Stamps. Distress Inks, I love and other Ranger products have made their way into my collection but I don't really like his blueprint sets and the crazier, creepier things he releases would just not go down well with my audience, regardless of my own opinion. Until his recent release of the Cityscapes stamps, that is.

I loved them the minute I saw them (except I can’t actually remember where that was) and knew I would have to wait a few weeks until they were available in the UK so I put them to the back of my mind until I saw this Cheiron Brandon card on Pinterest. I just had to seek them out. I found them on Artists Trading Post (and treated myself to a bottle of Cracked Pistachio Distress Ink while I was there too…really must open that!) and tried to recreate the card:

Paris Celebrate

It was crazy easy and I’m really pleased with it too. The sentiment is from a Winnie & Walter set called The Big, The Bold & The Party which was another one I saw on an American website and paced myself til it was available over here (although Tara at Make The Day Special is really good at getting these things quickly!) and its heat embossed in Black/Rainbow Glitter that I’ve had for forever:

Paris Celebrate CU

So while I was on a roll (around the world?) I tried New York too:

New York

They are stamped in Stazon onto Crawford & Black watercolour paper and the colour was added with the Kuretake Gansai watercolour paints. So just Rome, Sydney & London to go. Better get my bags packed…

Monday, April 06, 2015

Experiments In Time & Space

Anybody that knows me in real life knows I have trouble getting out of bed in the morning and one unremarkable morning, I was lying in bed daydreaming about the cards I could make that day when this idea leapt into my head: why not use my WOW! Melt It Powder in the Doctor Who themed chocolate moulds we bought a while back from Lakeland and try and make a little TARDIS to stick to a card?

Well, I spent a fair bit of time experimenting to get the effect I wanted, reminding myself how the melt it powder worked and trying to add colour to it -  I ended up adding drops of distress ink into the molten powder and I had to experiment with how much to add as it immediately congealed. At one point I was really wishing for a Bunsen burner or at the very least a tripod like we used to have at school to stand the heat tool in! I improvised with a jar:

IMAG1132

I originally wanted to make two and stick them back to back but it was difficult to get them smooth enough and even when I did manage to get a pair together, it was way too large for a single embellishment so I kept to one and worked to make the back as flat as possible.

I had also considered adding it to the card via string to enable it to be “flying” through time and space but this proved too difficult so I made an aperture in the card, sandwiched sequins and stars between two pieces of acetate and glue dotted the TARDIS at a jaunty angle!

IMG_0471

The next morning, I got to my desk and it had fallen off… so I stuck it down with glue gun glue this time! I inked up a panel for the front and am still trying to decide what sentiment to use so here it is in its almost finished glory:

IMG_0465

IMG_0468

If anyone wants to chime in with an appropriate sentiment, feel free…

Friday, April 03, 2015

An Orange Coloured Day

Forty Orange

Shaker cards are all the rage, huh? Well they were just starting almost twelve months ago when I made this card! I’d read a blog post by the esteemed Aimes Gray (of course then she was still a Wanford) which suggested funky foam as a filler for shaker cards, instead of using tons of foam squares – genius, right? She was the first person I saw using it but of course its become de rigeur since then!

These papers are from the huge pile of 6x6 paper I seem to have collected, I’m fairly sure the flowers are My Minds Eye but I don’t know about the orange.. what I do know is that after trying just about every piece of paper behind the window I decided I needed the same pattern as the outside but I didn't have enough left *gasp* …so I scanned the small scrap I hadn't stuck down on to my computer, duplicated it ‘til it was big enough and printed it out myself! Resourceful, huh?

I made another card just like this a week later for a guy turning forty – but I cant find the photos… it was blue, I seem to remember…

Thanks For Looking

Thursday, April 02, 2015

Home Comforts

IMG_0245 This is a bit of an odd one, I admit…
Much to the disappointment of my customers (i.e. my mom and my work colleagues), I don’t like just sticking “Happy Birthday” on the front of each of my cards. Sometimes (in a totally non-pretentious way) they are a little work of art that needs…something else. I had seen a stencil of the US used on somebody’s blog (if I remember who I will come back add it in) and was gripped with the great idea to make one of the United Kingdom. So I did!

Robo Cop cut it from some stiff paper and then I sponged Distress Inks through it, added a little water for the inks to do their thang and when it was dry, I ran it through my printer (sometimes a perilous idea) to add the Jane Austen quote which seemed so fitting. I find watercolour paper difficult to cut, I never get a clean edge with my trimmer, often it tears, if anyone can give me any advice…?

Sunday, March 29, 2015

Calm & Bright

Here are some more from the commission back in December. Hope this isn't freaking you out but its less than nine months to go, I should probably start my shopping…

IMG_0424 IMG_0423
IMG_0422

IMG_0432

Again the Marianne dies have a connection to this, as the original card was a partial die cutting technique I’d tried with the Christmas Village but to make life easier for mass production, I recreated it in the Cricut Design Space. The banners were pretty fiddly and I trashed quite a few in the process but I got there in the end. All the sentiments are computer generated.

Thanks for looking!

Sunday, February 01, 2015

Season Of Colour

I realised, after reading a post by Jocelyn Olson, that I’ve hardly blogged about any of my Christmas cards. A very generous lady at work commissioned a whole load of cards from me, so I thought I would start with those:

IMG_0431 IMG_0430
IMG_0428 IMG_0427

The die cuts are a mixture of Marianne’s Christmas village and some I created myself in Cricut Design Space. The ‘happy’ is from Simon Says Stamp, I lopped the ‘s’ from the Cheers in the Paper Smooches birthday words die set and the ‘Christmas’ is a WInnie & Walter cut file.

I was pretty darn pleased with the end result!

Monday, November 24, 2014

Joyful Wishes


JoyfulWishes
This was another panel that's been knocking around for a while. I die cut the stars with Robo Cop and inked the panel with distress inks, then I backed it with holographic silver card. It had something else stuck to it initially but I decided I didn't like it so it got chucked in the maybe box and forgotten about.
This time, I die cut an aperture from another card and over stamped a new scene stamp from Stampin’ Up. The deer is from the same set and the sentiment is from Lawn Fawn.
…and I really love it!

Friday, November 21, 2014

Let Us Celebrate…

I saw this idea on the Make The Day Special blog and… it seems so obvious! But there you go!
CelebrateCake
It quite literally speaks for itself so I tried to keep the rest of the card plain (well, plain-ish!)
CelebrateCakeCloseUp
And who doesn't like cake?

Wednesday, November 19, 2014

Nautical Blues

BlueMap
These panels have been kicking around for over a year, they were very simply made by adding ink and pearlised water to my large acrylic block and squidging it on the paper. Once they were dry I ran the sheet through my printer and printed the map pattern as a overlay.
BlueMapToo
One panel was stuck down neatly and the other was roughed-up around the edges with the blade of my scissors. Each was embellished with die cut silver anchor and a simple sentiment.

Sunday, November 16, 2014

Inlaid Rainbow

This is a simple technique that I’ve seen in a few places. I drew the design up on Silhouette Studio and fitted four of them to the one sheet. I simply pulled each design apart and coloured one of the elements in with Promarkers. Then I fitted them back together and voila:
InlaidRainbow

Sunday, October 05, 2014

Tolstoy Trees

A few weeks ago, Google marked the birthday of Leo Tolstoy with a really rather cool animation on their homepage. It ended with an image of the man himself in a birch forest:
Tolstoy
And I was inspired! It helped that I had just bought Lawn Fawns “Joy To The Woods” stamp set which prominently features birch trees, of course. So I tried out resist embossing, a little bit of distress ink blending and a bit of die cutting:
TolstoyTrees
I realise the lilac and teal aren't exactly natural colours but it does kind of work. Although the orange I blended in to the top of the picture is lost behind the leaves, I am happy with my inking and I’m happy with how well the ironing off of the embossing powder worked too. I might try this one again with more wintery colours.

Saturday, September 13, 2014

A Lil Bit Foxy

Lawn Fawn have the cutest stamps, right? They have some competition but I think they consistently turn out the cutest little critters. After watching this video from Jennifer McGuire about the latest release, I had a look on headed straight to Make The Day Special and again was impressed by how quickly they have the new US stuff in…and bought some sets:

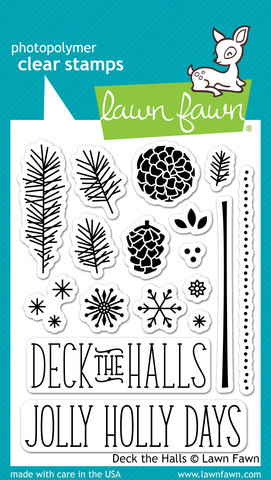
Joy To The Woods Deck the Halls

Then purely by chance (after I had made this card, honest) I saw that Moxie Fab are having a fox themed challenge, so it would be rude not to enter:

IMAG0354

The background is Hero Arts - and to be honest I don’t have much luck with it stamping cleanly but that could just be me – which I embossed with Wow! Silver Pearl powder (another recommendation of Mrs McGuire) and the trees are stamped in Memento London Fog on to vellum (or the Hobbycraft equivalent any how). It needs a sentiment but I’m leaving as is for now in the hope inspiration will strike at a later date…

Monday, September 01, 2014

Feathered Friends

Another recent trend is flamingos. Who doesn't like flamingos – except maybe the blue green algae.

FlamingoDetail

The watering hole behind it, still looks pretty much like the cloud it is but I’m pleased with the effect of the sequins –  borrowed from Lucy Abrams.

Flamingo

Monday, August 25, 2014

Keep It Together

I’ve seen a fair bit of partial die cutting around lately and wanted to give it a go but I don't have any of those stamp and die sets like Laura Bassen used in her tutorial, but it occurred to me that the houses from the Marianne Christmas village might work.

IMAG0193

Annoyingly, I managed to crease one and almost cut through the other…but it kind of worked!

IMAG0197

…and I’m pleased with my inking!

Monday, August 18, 2014

Monkey Business

DSC_0086

After seeing this amazingly cute monkey by Laura Bassen, I thought “that would easily translate into a shaped card.. “ and so it did!

I cut the shapes out on Robo Cop so I’m afraid I cant be as useful as she was with her measurements but I DID make sure it would fit in an envelope – allbeit “on the squiff”

DSC_0087

I cut his eye ‘holes’ out of his heart shaped face and backed them with acetate so they shine when they catch the light…

Monday, August 11, 2014

Come To A Party

IMAG0236

Isn't it funny how a perfectly innocent conversation can result in.. well, a commission.

A colleague was telling me about a party she was organising for her father later in the year and by the end of the conversation, I was making her invitations and my friend is doing the cake!

I knew I wanted to go with a blue, white & silver theme and stripes – inspiration from the West Bromwich Albion logo – and I saw a design on Pinterest with a flowing font for the number so I tried it myself!

I created the postcards in Photoshop and the ‘seventy’ was cut by Robo Cop. Here is a closer look:

Toghill_2

Toghill_1

As I said on Instagram, you get half way through something like this and wonder why you ever started…but its usually worth it in the end!

Sunday, June 01, 2014

Motorcycle Emptiness

MotorcycleEmptiness
This was a commission for a motorbike enthusiast. Well I assume he's an enthusiast as he now owns three! I know nothing about motorbikes..so this wasn't easy for me, I spent a fair while looking for a suitable image and finally settled on this one.
I got my layout from this card (found on Pinterest) the text paper is Stampin’ Up, the map is an old road atlas that I soaked in brown Dylusions and the twine is from Tim Holtz – i only just bought it so it was still on my desk!

Sunday, May 25, 2014

Even The Dark Side Celebrate Xmas…?

VaderXmas
This was another fairly easy to construct crazy commission! The Silhouette Software did most of the hard work!
And the recipient loved it so, mission accomplished!

Tuesday, May 20, 2014

Take The Plunge

A commission from a work colleague got the creative juices flowing back in December and i knew just what I wanted to do…
Trev_Front
Trev_inside2 An alcohol fuelled conversation between the colleagues had resulted in the birthday boy promising to complete a sky dive in 2014. So I was asked to create a sky diving themed card with very little notice! I used the HA Silly Scape digi stamp to create a skyline on the front to give the airplane something to fly over. Then i messed about – for hours! – trying to remember how to create the twisting pop-up mechanism I’ve used before (but don't seem to have photographed!)

Trev_inside1
I initially cut the five people out in a ring but when it came to assemble the card, they were too big and prevented it from closing so I chopped them up and spread them out a bit. The map is a page from an old atlas.
The twisting effect is lost a little but the design had the overall impact I was after so, I think it was a success…
And if you are concerned for my colleague, this is not the first crazy idea he has had! These was taken at the subsequent birthday party:
1202
“Don’t have nightmares!”